Collections
Collections allow you to group individual media items into organized bundles that can be browsed, shared, or processed together.
Once you have added items to a collection, you can apply metadata to the collection itself, manage access rights to share it with other users or groups, or perform bulk actions such as exporting, archiving, or transcoding.
Unlike traditional file folders, an item or a sub-collection in Cantemo can belong to multiple parent collections at the same time.
The Collections panel
You can access your collections from the Search page by clicking the Collections icon (folder icon) in the left-hand sidebar.
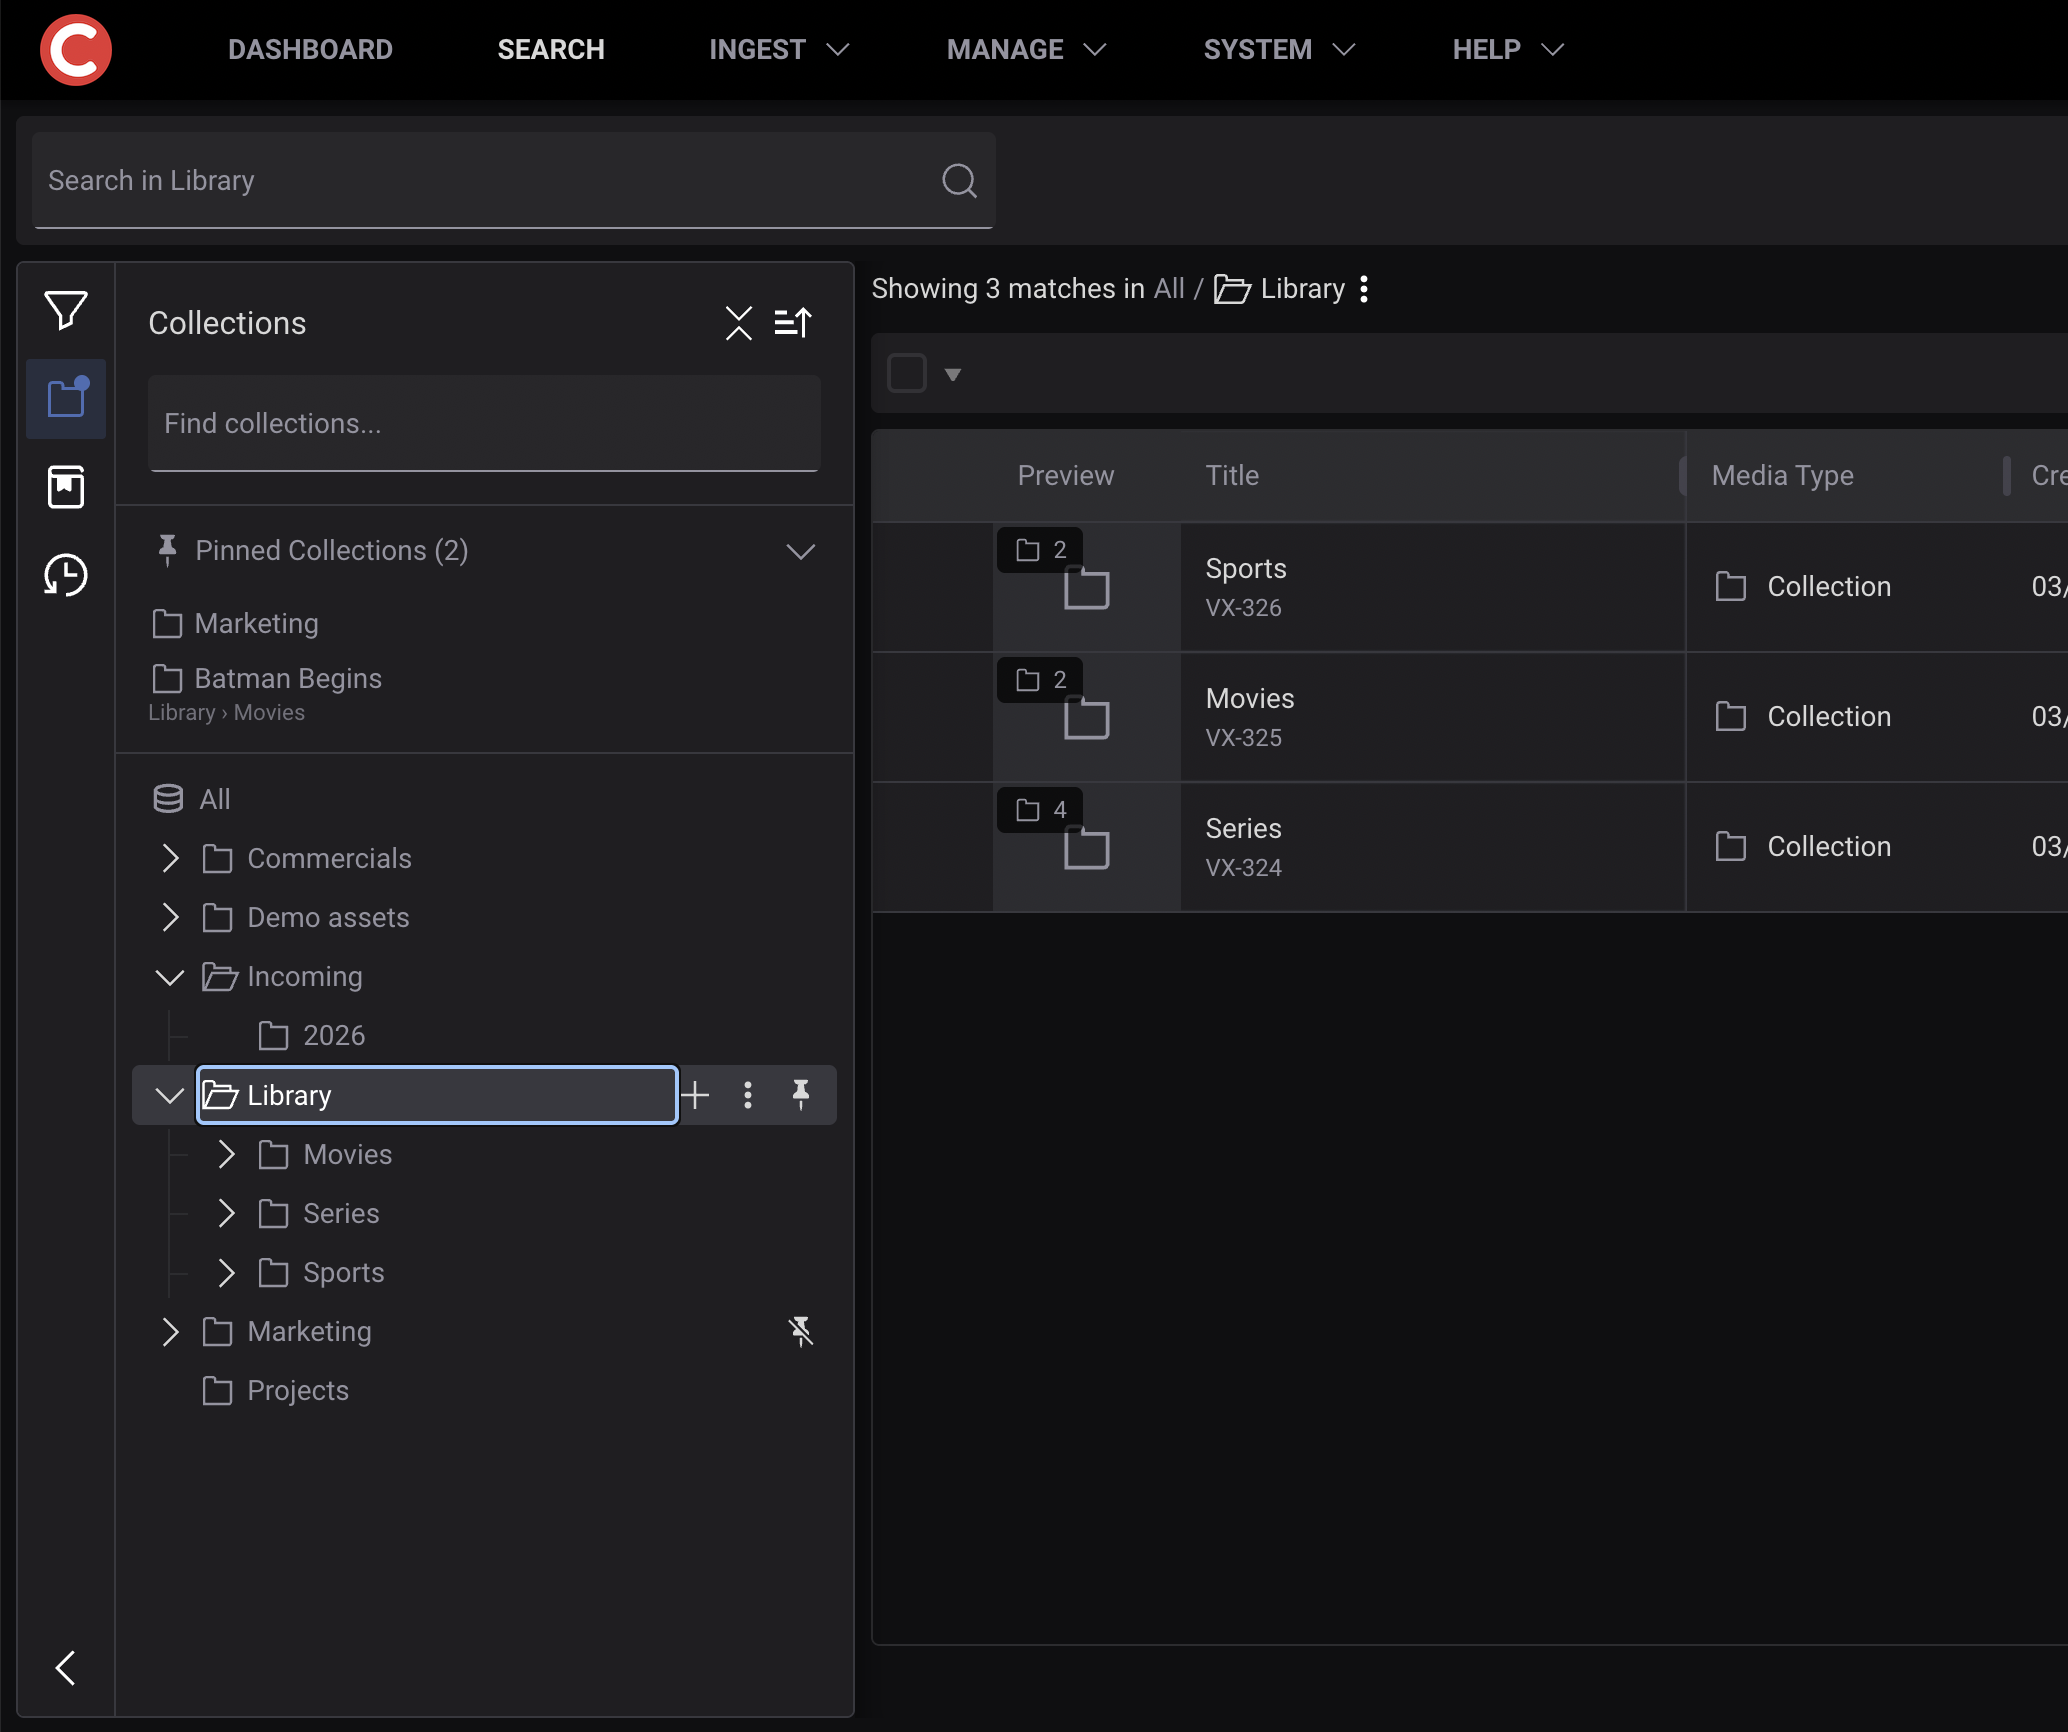
The Collections panel showing Pinned Collections, the hierarchical tree view, and top control icons.
The panel is divided into key areas to help you navigate both simple and deeply nested hierarchies:
Find collections: Quickly filter the collection tree by name.
Sort and Collapse controls: Located at the top right of the panel, allowing you to change the sort order or collapse all open branches at once.
Pinned Collections: A collapsible section at the top for quick access to your favorite collections.
All (Collection Tree): The main hierarchical tree containing all collections you have access to.
Finding collections in the tree
In large systems with complex hierarchies, you can use the Find collections… search bar at the top of the Collections panel to locate specific collections quickly.
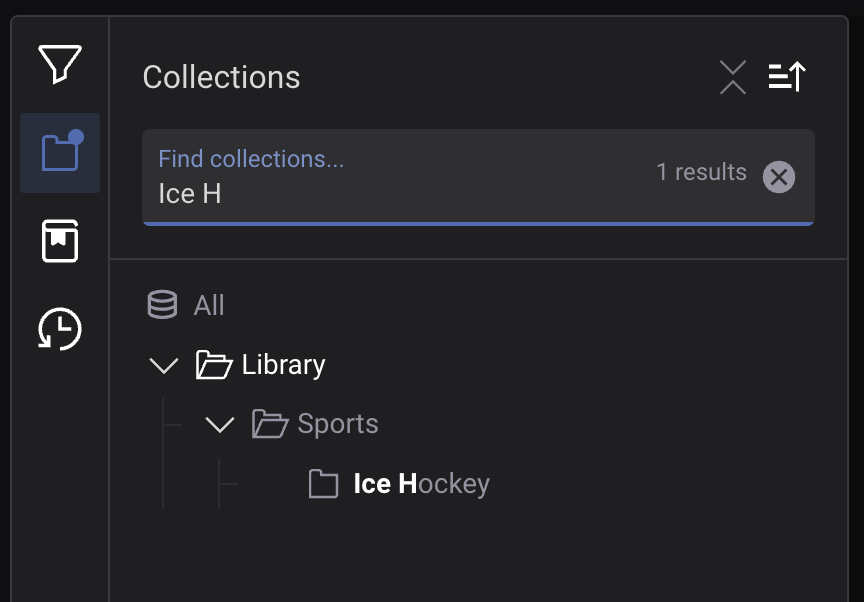
Filtering the collection tree using partial word matching.
Name matching: The filter searches within collection names and is case-insensitive.
Smart partial matching: You do not need to type the full name. You can type the beginning of multiple words. For example, type
Bre Bato find Breaking Bad, orSea 2to find Season 2.Automatic context expansion: Matching collections are highlighted in bold alongside the total number of matches. The tree automatically expands to show the matching collections together with their parent and ancestor collections, so you can clearly see where each match resides in the hierarchy.
Click the X icon inside the search field to clear the filter and return to the standard tree view.
Pinned collections
If there are collections or sub-collections that you work with frequently, you can pin them to the Pinned Collections section at the top of the panel. Pins are personal to your user account and are saved across sessions.
To pin a collection: Hover your mouse over any collection in the tree and click the Pin icon that appears on the right.
To unpin a collection: Hover over the collection (either in the Pinned Collections list or in the main tree) and click the Pin icon again.
You can expand or collapse the Pinned Collections section at any time by clicking its header.
Sorting collections
You can change the order in which collections appear in the tree by clicking the Sort icon at the top right of the Collections panel.
Collections can be sorted by:
Name (A–Z)
Name (Z–A)
Date Created (Newest)
Date Created (Oldest)
Creating collections and sub-collections
If your account has permission to create collections, you can create new top-level collections and sub-collections from the Collections panel or a collection’s menu.
Creating from the Collections panel
Click Create Collection at the bottom of the Collections panel. If you are viewing a collection, choose Add as root collection or Add as sub-collection to: that collection.
To create a sub-collection in a specific collection, you can instead open the parent collection’s three-dot menu (⋮) and select Add Sub-Collection.
Enter a Name and choose a Collection profile, or Keep private, in the dialog.
Click Create to save, or Cancel to close the dialog without creating a collection.
Note
Creating a sub-collection also requires write access to its parent collection.
Creating when adding items
You can also create a new collection on the fly when adding media items to a collection. In the Add to Collection dialog, simply type a new collection name and press Enter.
Adding items and organizing with drag-and-drop
Using drag-and-drop
You can organize both media items and collections using drag-and-drop. As you drag an item or collection over a valid target in the tree, the target is highlighted to indicate where it will be placed.
Adding items to a collection: When viewing search results in the Grid view, drag one or more media item pods (or collection pods) and drop them onto a target collection in the Collections panel (or onto a collection pod in the grid). Note that dragging from the search results is only supported in the Grid view, not in the List view.
Moving collections in the tree: Within the Collections panel, drag a collection and drop it onto another collection to make it a sub-collection, or drop it onto All to place it at the top level.
Note
Moving or adding items and collections requires write permissions on the destination collection. If you drag a collection to which you only have read access and drop it onto a collection where you have write access, it will be added to the new parent collection without being removed from its original location.
Actions on a collection
To perform actions on a specific collection, hover over the collection in the tree (or on a collection pod in the search results) and click the three-dot menu (⋮).

The Collection actions menu.
Depending on your access rights, the following actions are available:
- Add to Media Bin
Adds the collection to your personal Media Bin.
- Rename
Opens the Rename Collection dialog. Enter the new name and click Rename or press Enter to save. To cancel, click Cancel, press Esc, click the X icon, or click outside the dialog.
- Add Sub-Collection
Creates a new collection inside the selected collection.
- Upload into
Uploads new media files directly into this collection.
- Collection Metadata
Opens the metadata view to create, view, or edit metadata for the collection.
- Open with…
Opens the collection using an external integration or configured tool.
- Manage Access Rights
Views or edits the access control list (ACL) for the collection (requires write permissions).
- Share
Shares the collection with other users.
- Delete
Deletes the collection (requires write permissions). Deleting a collection only removes the collection container itself. Any sub-collections or media items inside it are not deleted.
Actions on collection items
When viewing the contents of a collection, you can select individual items to perform actions on them, or use the collection action menu for bulk operations on the collection’s items (such as archiving). To perform actions on every item across all pages in the collection, use Select all Items on all pages.
Manage access rights

Access rights on a collection affect all existing items within the collection.
Selecting Manage Access Rights from a collection’s menu opens the permissions view:
Access Control tab: Displays current access control entries and allows you to edit them.
Audit tab: Shows all individual users who have access to the collection and indicates the source of that access (for example, inherited from a parent collection or applied via a Rule).
To add or remove permissions, click Edit Access Rights. Any changes you make are applied once you click Save.
Collection metadata
Metadata can be applied to collections in the same way it is applied to individual media items. This makes the collection searchable via metadata filters on the main Search page.

Add metadata to a collection to make it searchable from the main search page.
Open the three-dot menu (⋮) on a collection and select Collection Metadata.
If the collection does not have any metadata yet, your default metadata group is presented automatically. If needed, select a different metadata form for the group.
Fill in the desired metadata fields and click Save Changes.
