OpenID Connect (OIDC) Authentication
OpenID Connect (OIDC) Authentication allows users to login to a Cantemo system using a secondary user management system.
This works with any OIDC provider, such as Google Apps. But we recommend using a specific application as the provider, such as Keycloak https://www.keycloak.org/
This provides better configuration options for the authentication and session details than using for example Google Apps directly.
More information about OIDC: https://openid.net/connect/
Basic Usage
When a user comes to the login screen they will now have the additional option to log in using the configured OIDC provider.
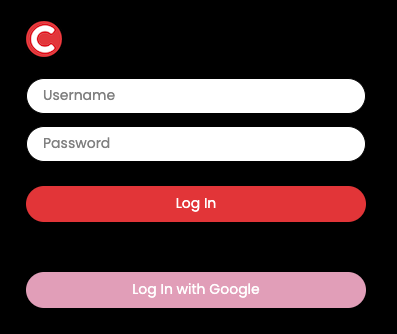
When the user clicks the second login button on the login page they will be redirected to the login screen of the identity provider.
When the user accepts the login, they are redirected back to Cantemo.
User email is used as the Cantemo username, additionally user First name and Last Name are set based on information from the provider.
All new users will be part of user group(s) defined by the admin.
The text on the OIDC login button is configurable.
Installation
1. Add the authentication backend portal.plugins.oidc_auth.auth.OIDCAuthenticationBackend
by editing /etc/cantemo/portal/portal.conf in your favourite
editor, in the section [enable_extras]:
AUTHENTICATION_BACKENDS =
     portal.plugins.oidc_auth.auth.OIDCAuthenticationBackend,
     portal.vidispine.authentication.VidispineBackend,
     django.contrib.auth.backends.ModelBackend
Make sure you have a User Group setup for new users logging in using this provider
3. Add OIDC configuration to /opt/cantemo/portal/portal/localsettings.py - see
the two next chapters for examples. This must be done before restarting the Cantemo Services.
Enable the OpenID Connect (OIDC) Authentication app from System > Overview
Restart Cantemo services
systemctl restart portal.target
Note that if Cantemo is behind a reverse proxy or load balancer, then it’s important to make sure that the following headers are set correctly:
Host
X-Forwarded-Proto
X-Forwarded-For
Nginx example:
location / {
    # This is the address of your Cantemo system
    proxy_pass http://10.101.145.17:80;

    # 1. Passes the correct public-facing domain name
    proxy_set_header Host $host;

    # 2. Passes the correct protocol (https)
    proxy_set_header X-Forwarded-Proto $scheme;

    # 3. Passes the user's real IP address
    proxy_set_header X-Forwarded-For $proxy_add_x_forwarded_for;

    # 4. A simpler version of the user's IP (good practice)
    proxy_set_header X-Real-IP $remote_addr;
}
OIDC Configuration
All the below configuration fields should be set in /opt/cantemo/portal/portal/localsettings.py
See the folder /opt/cantemo/portal/portal/plugins/oidc_auth/localsettings_examples/ for full
examples.
The following OICD Specific values must be set:
OIDC_RP_CLIENT_ID = "<id from keycloak>"
OIDC_RP_CLIENT_SECRET = "<secret from keycloak>"
User group names for new users must be set:
OIDC_AUTH_NEW_USER_GROUPS = ["<Name of User Group 1>", "<Name of User Group 2>"]
Optionally the following can be used to control the text in the login button:
OIDC_AUTH_LOGIN_BUTTON_TEXT = "Log in with Keycloak"
Styling of the button can be changed with OIDC_AUTH_LOGIN_BUTTON_BACKGROUND,
OIDC_AUTH_LOGIN_BUTTON_BACKGROUND_HOVER, OIDC_AUTH_LOGIN_BUTTON_TEXT_COLOR, and
OIDC_AUTH_LOGIN_BUTTON_TEXT_COLOR_HOVER.
Additionally server end-points for authentication, token, userinfo and certs must be defined. In the case of Keycloak these can be derived from the main Keycloak address, in the case of Google they are global defaults.
See below for more information.
Provider Specific Configuration Examples
Keycloak
Example configuration is available at
/opt/cantemo/portal/portal/plugins/oidc_auth/localsettings_examples/keycloak_example.txt
Fill in values for these rows:
OIDC_AUTH_NEW_USER_GROUPS = ["<Name of User Group>"]
OIDC_RP_CLIENT_ID = "<id from keycloak>"
OIDC_RP_CLIENT_SECRET = "<secret from keycloak>"
KEYCLOAK_SERVER_OPEN_CONNECT_ID_URL = "http://<key cloak server address>/realms/development/protocol/openid-connect/"
Google
Example configuration is available at
/opt/cantemo/portal/portal/plugins/oidc_auth/localsettings_examples/google_example.txt
Fill in values for these mandatory rows:
OIDC_AUTH_NEW_USER_GROUPS = ["<Name of User Group>"]
OIDC_RP_CLIENT_ID = "<Client ID from Google>"
OIDC_RP_CLIENT_SECRET = "<Client Secret from Google>"
Setting up OIDC for a Google Apps domain
To use “Log in with Google” you must have a domain that is connected with Google Apps (e.g. uses GMail).
You must add a project to the Google Apps domain and enable OAuth 2.0 on the project. Documentation for this is available at https://developers.google.com/identity/openid-connect/openid-connect
High-level steps in the Google Cloud Console are:
Create a New Project
- Configure OAuth consent screen
User Type: Internal
Make sure to fill in “App domain” - full URL domain for your Cantemo system
And also “Authorized domains” - plain domain for your Cantemo system
For “scopes” select “email”, “openid” and “profile”
- Under Credentials create a new OAuth 2.0 client ID
“Authorized JavaScript origins” should be full Cantemo URL
“Authorized redirect URI” should point back to
/oidc/callback/on the server, for examplehttps://cantemo.example.com/oidc/callback/This will give the Client ID and Client Secret values to add to
localsettings.py