Export Locations
Export locations are storages or defined locations to which the system will be able to transfer files to. An example is a remote FTP server.
These are setup by administrators for users to utilize as part of your or their workflow. Different users can be given or restricted access by setting this up in their associated groups.
List View
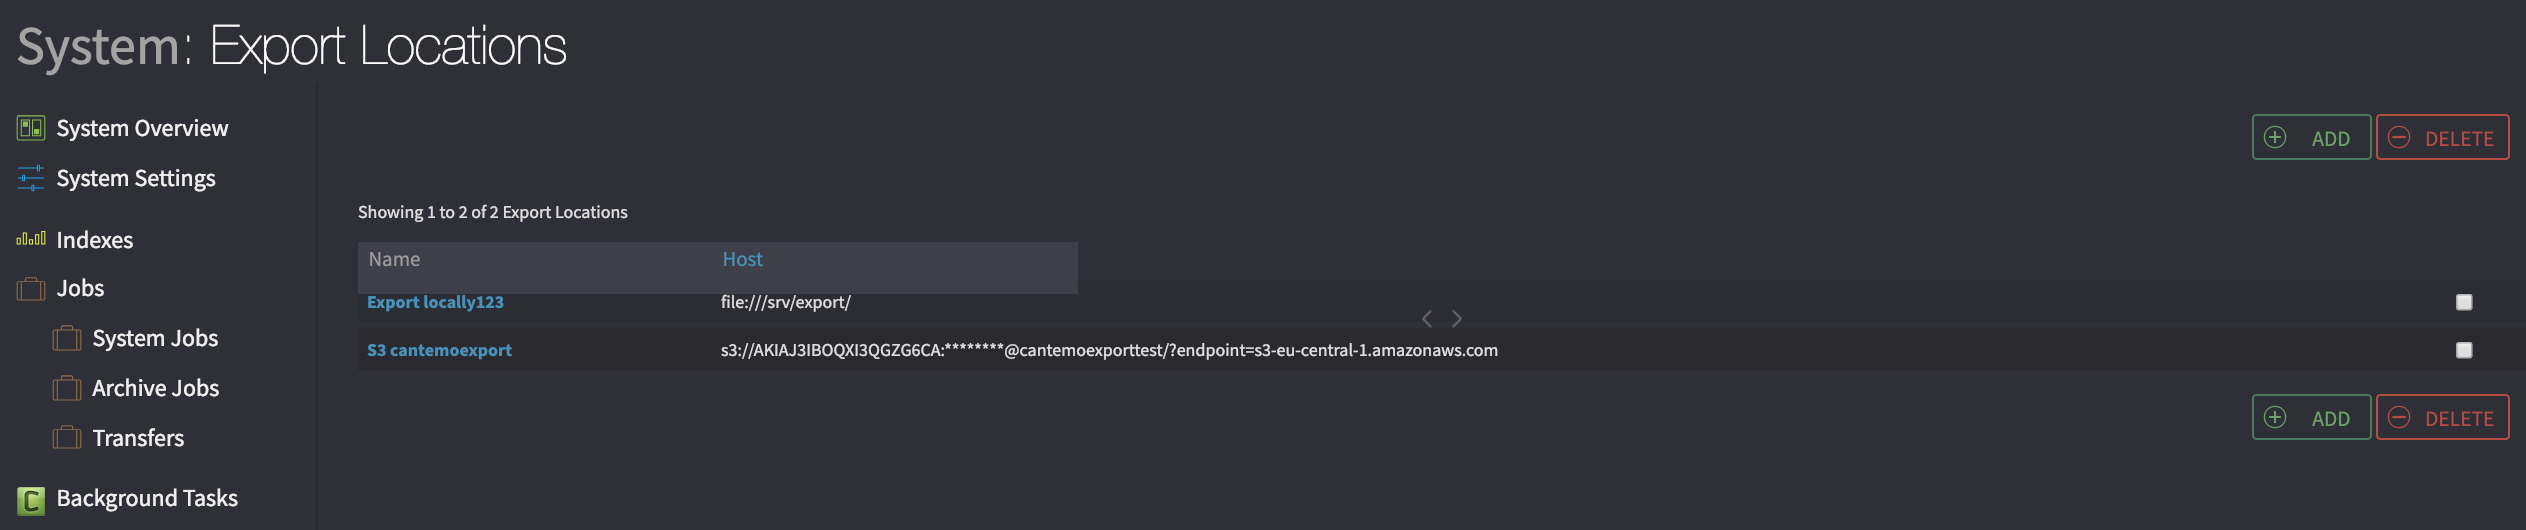
Export locations overview page.
To see what export locations are configured with the system click on “Export Locations” in the admin menu. You will see an overview of the export locations with their given name and their host address and port.
Click on the name to view more details or update the export location.
Adding
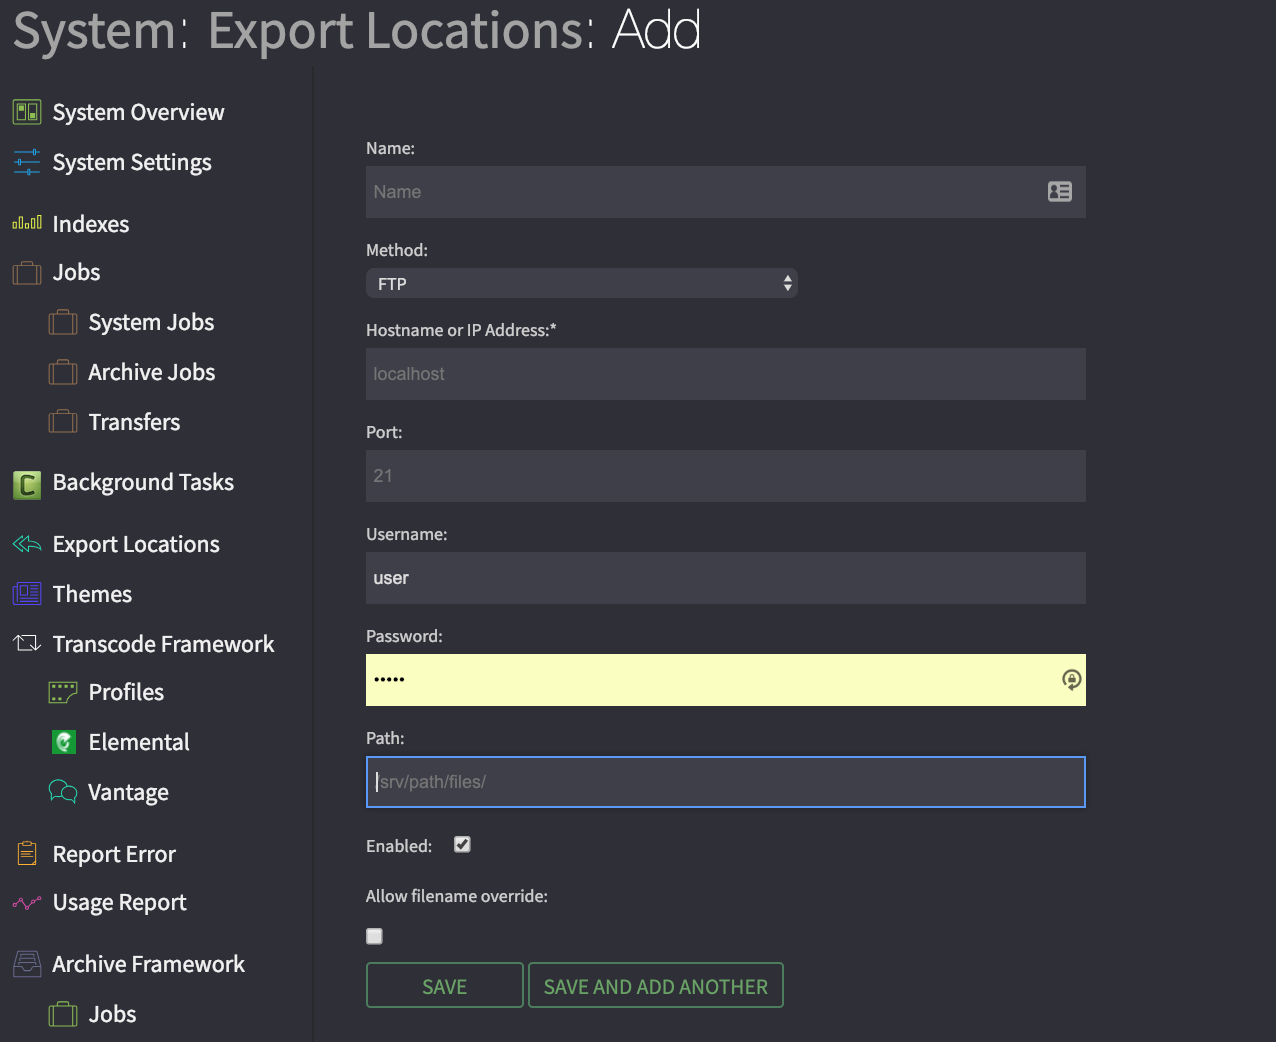
To add an export location click “Add” from the export location list view. You will be shown a form, fill the attributes and click “Add”.
- Name
A text label used when selecting this export profile in Cantemo by users.
- Method
Choose which protocol you will be sending files using.
- Hostname or IP Address
The hostname or IP Address for the export location. If the system is external please make sure that the system can get to the IP address you enter here. If using hostnames, please make sure that the name is resolvable.
- Port
The port to use. Please make sure that the port is listening and accessible from the system.
- Path
The path on the remote server.
Note
For S3 the path must start with the bucket name.
- Username
Username that the system will supply when challenged by the external system.
- Password
Password that the system will supply when challenged by the external system.
- Enabled
Flag to enable or disable the usage of this export location by users.
- Allow filename override
Allow users to enter their own filename when exporting to this location. If not enabled, the system will default to the original filename.
Updating
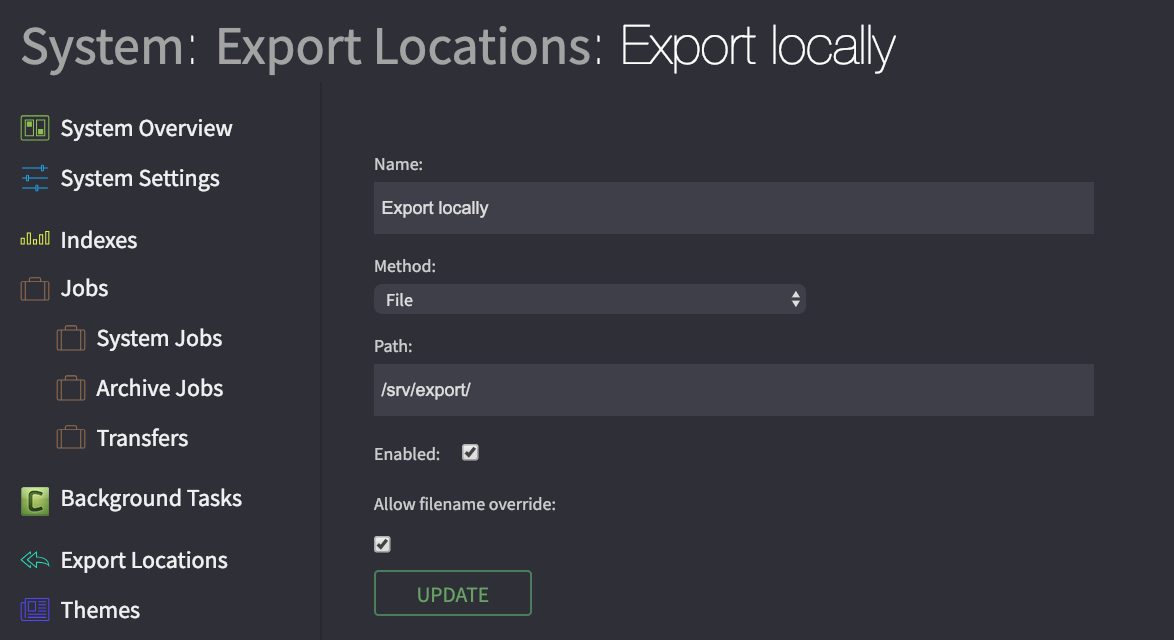
To update the export location click on the name from the export location list view and then update the details as needed. Click “Update” to save.
Deleting
Choose the export location from the list view and choose delete. You will be asked to confirm your deletion.
Using
Once you have setup the export locations for your system, they can only be used by users once they are set in the groups that users are using.
For example, if you have a export location “web”, and you want all users that are in the group “webmasters” to be able to export to that location:
Create the export location called “web”
Go into the group “webmasters” in Cantemo
Add the export location to the list in under the tab “export locations”.
Click “Save & Continue”
Note
If you don’t complete these steps and setup which groups have access to which export locations, the export locations won’t show in the interface for users.