Cantemo NLE Integration
Cantemo comes with integration with Adobe Premiere Pro. This section details how to configure this integration.
Cantemo Agent installation
Under the Help menu in the Cantemo interface you can download the latest version of the Cantemo Agent included with your Cantemo Cantemo. Download this pkg-file to your Mac, then, double-click the it and follow the instructions on the screen.
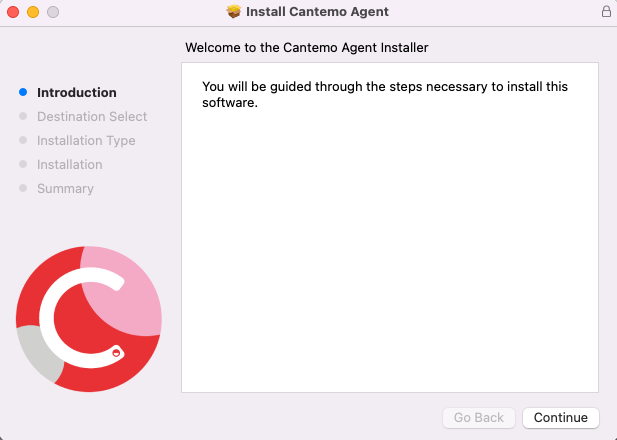
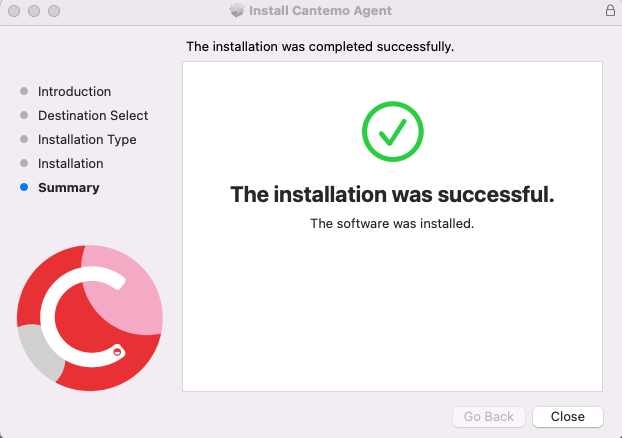
Start the Agent installation by selecting a destination clicking continue. Then, when the installation finishes successfully, the installer will display this message:
Configuration overview
- For NLEs to seamlessly open media assets the NLE hosts themselves must mount Cantemo’s storage areas. In order to provide links to the media, Cantemo must in turn know which paths the NLE hosts use to access these areas. The following actions must therefore be performed for each storage area in Cantemo:
Tell Cantemo which path NLE hosts will use to access the area
Mount the area on each NLE host
Make the area accessible to the NLE hosts
The guide will cover how to configure Cantemo with information about where NLE hosts mount the storage areas. The guide will also cover how to export a storage area local to the Cantemo server via SMB and how to mount that area on the NLE hosts. Please bear in mind that, depending on storage solution, it might not be the best course of action to re-export an external filesystem mounted by the Cantemo server. A better course of action might be to have the NLE hosts mount the external filesystem in the same manner as the Cantemo server does.
Cantemo application configuration
The NLE configuration in Cantemo can all be found in the WebUI under ‘Admin’->’Transfer Settings’
Storage mount points
You must configure one setting for Mac and one for Windows clients, since the filesystem layouts are different for the two operating systems.
Enable Open with…
Cantemo has the ability to open files on the client using a custom handler script or application. This functionality is described in more detail later in this document. This setting enables and disables the menu option on a per system basis.
Note
Make sure that the NLE export storage does not have Auto Ingest enabled.
Cantemo server OS configuration (SMB export)
It is important to note that this is an example configuration and you should understand the specifics of the Linux Samba daemon (smbd) when using smbd on a production system. We will not cover integration with directory systems or domains, please contact your System integrator or local Administrator to do so.
Make sure that SELinux is disabled in this file:
vim /etc/selinux/config
The line you should be changing begins with SELINUX. Make sure it reads as:
SELINUX=disabled
Save and exit ( :wq - type colon, ‘w’, ‘q’ and press ENTER key)
Make sure you reboot your system to make this setting take effect.
Log in as root and install the Samba packages:
yum -y install samba samba-client samba-common
Set the services to start at boot:
chkconfig smb on
chkconfig nmb on
The settings you need depend on what your network setup is like, for instance whether you have a workgroup or a domain.
Settings are edited in /etc/samba/smb.conf
This is an example configuration (do not replace the complete file with this) for a workgroup ‘WORKGROUP’, and serving media1 storage:
[global]
 workgroup = WORKGROUP
 security = user
 map to guest = bad user
#=================== Share Definitions =================
[media1]
 path = /srv/media1
 comment = Cantemo Media1
 browsable = yes
 writable = yes
 guest ok = yes
 valid users = vidispine
 public = yes
Save the configuration file, then add the vidispine user password:
smbpasswd -a vidispine
Restart the daemons:
service smb restart
service nmb restart
NLE host configuration
- There are two things to configure on the NLE host as well. These are:
Cantemo Agent preferences
Mount Cantemo storage areas
Cantemo Agent preferences
The Cantemo Agent preferences looks like this:

Cantemo Server
IP address or hostname of the Cantemo server as well as the port used to communicate with it.
Clicking on Login will forward user to login with their browser. This creates a token that the Agent will use for authentication.
Transfer Limits
Bandwidth can be specified as a float to cap the amount of Megabytes transferred per second. This is an aggregation of concurrent Uploads and Downloads.
Watchfolder
The agent can be configured to monitor a watchfolder on the client’s local filesystem. Media exported to this location will trigger the agent’s upload funtionality, presenting the user with an export window with the ability to enter metadata.
Helper App
This preference sets the executable for Helper App - please see Helper App API for more information.
Logging
The logging section in the agent preferences can be used to tune logging.
Write log to syslog - The log messages will show up in the Console application in OS X under system.log unless configured otherwise locally
Write log to file - The log messages will be written to ~/Library/Logs/Cantemo/agent.log
Enable debug log - Will enable more extensive logging for debuging purposes
Helper App API
The agent has support for two versions of helper apps:
Version 1: “Open with…” integration
Version 2: Pre- and post-hooks for various events in the agent
Version 1 Helper App
The agent has the ability to defer file opening (“Open with…” from Cantemo) to a local helper app which can either be an excecutable shellscript or and OS X application such as an Apple Script or a Cocoa application.
If the helper app is an OS X application it will receive an Open message via the Apple Event system. See https://developer.apple.com/library/mac/documentation/cocoa/conceptual/ScriptableCocoaApplications/SApps_handle_AEs/SAppsHandleAEs.html for more information.
If the helper app is a standard executable then it will receive the file name as it’s argument list. In case the bin or a collection is opened the executable will recieve each file name as an own argument.
The following shell script is an example handler which opens different applications depending on extension
#! /bin/bash

# From Cantemo 2.0.0 and forward the Cantemo Agent will also be able to do
# "Open With .." on collections and the bin se we need to iterate over all
# args/files

for arg in "$@"
do
    echo "$arg"

# Get the extention of the file
EXT="${arg##*.}"

if [[ $EXT == "pdf" || $EXT == "psd" ]]; then
    # Open pdf and  psd files with the default application
    open "$arg"
elif [[ $EXT == "doc" || $EXT == "docx" ]]; then
    # Open word documents with office
    open -a "/Applications/Microsoft Office 2011/Microsoft Word.app" "$arg"
else
    # Show all other files in the finder
    open -R "$arg"
fi

done
Version 2 Helper App
Helper app version 2 integrates to various events in the agent, and can accept of cancel operations based on the selected files. For example it could filter for accepted filenames, or trigger automatic Q&A on the client, before accepting files for upload.
All communication with the executable is done with Standard input/output (STDIN/STDOUT) using JSON formatted messages.
Example scripts are available at https://github.com/Cantemo/Community/tree/master/agent_scripts
Detecting a V2 Helper App
Helper App V2 executables are detected by calling them without any input or arguments.
In this case the app should write to STDOUT a JSON with “api_version” 2 and optionally an “app_name”. This all must be on one line, i.e. without line breaks.
For example the following simple Python script registers as an V2 Helper App:
#!/usr/bin/env python
import json
print json.dumps({'api_version': 2, 'app_name': 'Hook Handler Example'})
Handling a newly detected file in V2 Helper App
For other inputs, the Helper App must read STDIN and parse that as JSON to act on the files.
An example JSON from the Agent when two files are ready for upload:
{
    "operation": "file_ready",
    "files": [
        {
            "path": "/tmp/watchfolder/file1.mov"
        },
        {
            "path": "/tmp/watchfolder/subfolder/File2.mov"
        }
    ]
}
The helper app must respond with a status for each of the files, for example:
{
    "files": [
        {
            "path": "/tmp/watchfolder/file1.mov",
            "status": "ok"
        },
        {
            "path": "/tmp/watchfolder/subfolder/File2.mov",
            "status": "failed",
            "message": "Filename must not contain upper case"
        }
    ]
}
Please note that the above has been formatted with newlines for readability, the app response must not include newlines in the JSON. So the output would actually be on one line:
{"files":[{"path":"/tmp/watchfolder/file1.mov","status":"ok"}...
As an example the following Python script will decline files that have upper case characters in their filename:
#!/usr/bin/env python
import json
import os
import select
import sys

# Check if there is incoming data on STDIN and read it
r_list, w_list, x_list = select.select([sys.stdin], [], [], 0)
if not r_list:
    # No input - give API level response so Agent can detect support
    json.dump({'api_version': 2, 'app_name': 'Example'}, sys.stdout)
else:
    # Else return status per file - we don't need to care about the
    # input "operation" here
    request = json.loads(sys.stdin.read())
    file_statuses = []

    for f in request.get('files', []):
        file_status = {'path': f['path'], 'status': 'ok'}
        # Check if filename has uppercase characters, if so deny upload
        filename = os.path.basename(f['path'])
        if any(c.isupper() for c in filename):
            file_status['status'] = 'failed'
            file_status['message'] = 'Filename must not contain upper case'
        file_statuses.append(file_status)

    json.dump({'files': file_statuses}, sys.stdout)
In the Upload case, the agent will not let user proceed with the upload until the helper app has explicitly responded with “ok” status for all the files.
Displaying progress from V2 Helper App
If the helper app takes a long time to analyse a file, it can signal progress back to the agent. For example if the helper app executes some quality assurrance on a video clip, and the QA tool gives back progress values.
This is shown in the agent as a progress bar. Status value “processing” should be used in this case, and the floating point value “progress” which should be between 0.0 and 1.0.
For example:
Agent sends “file_ready”:
{
    "operation": "file_ready",
    "files": [{ "path": "/tmp/file1.mov" }]
}
Helper app responds immediately with zero progress:
{"files":[{"path": "/tmp/file1.mov", "status":"processing", "progress":0.0}]}
… and keeping the STDOUT open, later writes:
{"files":[{"path": "/tmp/file1.mov", "status":"processing", "progress":0.5}]}
This will update the UI to show a 50% done progress bar. Finally when the helper app is finished it sends:
{"files":[{"path": "/tmp/file1.mov", "status":"ok"}]}
Each step with “progress” can be combined with a “message” for additional information.
Full list of V2 Helper App operations
The operations currently sent from Mac Agent to Helper App are:
file_new - when a file is detected by the Agent - note that the file may not yet be readable or exist in the given path
file_ready - when a file is ready (closed) and fully readable
file_removed - when a file that was in Agent Upload window is removed
file_reopened - when a file that was ready is written to again
open_with - User has selected “Open With…” from Cantemo, Helper App should open the files on the client. Note: In this case there may not be an item window open in the Agent, any “failed” statuses will be shown as an error dialog, other messages and progress will be ignored.
Adobe Premiere Plugin Installation
Install the Cantemo Agent.
Configure the Cantemo Agent watch folder and settings.
Close down Adobe Premiere Pro if it is running.
Install Cantemo Panel via the Help menu in the Cantemo UI.
Setup the shared storage as recommended in the NLE plugin.
Start-up Adobe Premiere Pro
Start-up Adobe Media Encoder.
Close Adobe Media Encoder.
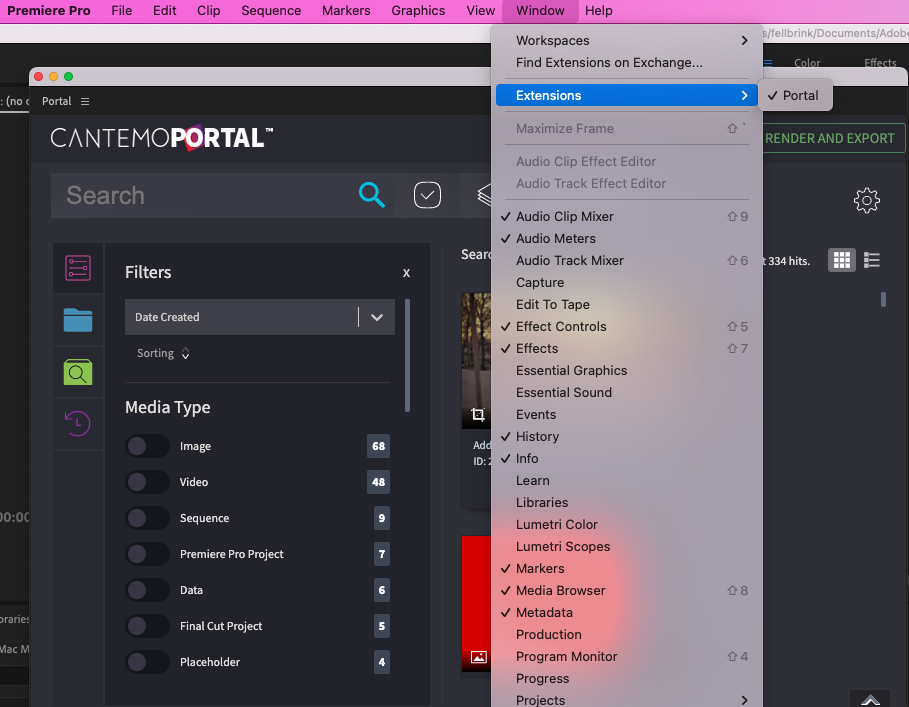
Click Window > Extensions > Cantemo to open the panel.
The Panel then fetches the login information from Cantemo Agent
Premiere Pro Plugin installation
Please make sure that you also followed the step to start up and close Adobe Media Encoder to get the transcode profiles listed. After you have installed the plugin you will need to start up both the Adobe Media Encoder and then Adobe Premiere Pro to get the transcode profiles listed.
Close Adobe Premiere Pro if it is running.
Start Adobe Media Encoder.
Close Adobe Media Encoder.
Start Adobe Premiere Pro.
You are now ready to use the Cantemo Premiere Pro Panel
Important
Make sure your NLE is able to write to your shared storage where the media is located!
Mount using SMB
The easiest way to mount an SMB storage in OSX is to open the “Connect to server” dialog in Finder. This can be found under “Go”->”Connect to server” or via the <command>-<K> keyboard shortcut. In the server address window that opens you then type “smb://portal.local/” and hit connect.
Alternatively you can type the following into a command window on your mac:
sudo mkdir /Volumes/media1
sudo mount_smbfs -W Workgroup vidispine@portal.local/srv/media1 /Volumes/media1
Regardless of method you should then see some files if you execute the following command on your mac:
ls /Volumes/media1
In Windows you can use the Explorer window to mount the shares.
Mounting Quantum Stornext
On MacOS we recommend mounting Quantum Stornext storages using Xsan rather than SMB.
Proxy workflow
Enabling Proxy workflow is done in Transfer settings transfer_settings.
If you have enabled Proxy workflow, each Item will have two files associated, an original and a proxy file. The system will work with any one of them available.
Then you are able switch between the original and proxy in your editor.