Running Cantemo
Running Cantemo depends on the installation mechanism that you have chosen. However, if you have installed with our recommended configuration, all services can be run from systemctl:
sudo systemctl start portal.target
Monitoring Cantemo
Cantemo has its internal healthchecks but more things needs to be monitored. There are lots of external tool to check:
* Load
* Disk Usage
* Memory consumption
It is always good to have such tool installed.
Stopping & Restarting Cantemo
RedHat / CentOS systems stop the remaining processes using these commands:
$ sudo systemctl stop portal.target
$ sudo systemctl stop opensearch
$ sudo systemctl stop vidispine
$ sudo systemctl stop transcoder
Start everything up again.
RedHat / CentOS systems starts using these commands:
$ sudo systemctl start vidispine
$ sudo systemctl start transcoder
$ sudo systemctl start opensearch
$ sudo systemctl start portal.target
Status of services
For an overview of what services are running at any particular time.
RedHat / CentOS systems:
sudo systemctl status
Systemctl:
sudo systemctl
There you can issue commands such as reload, status, help, stop, start, quit. Type help for more information.
Nginx (or other webservers)
Cantemo creates an interface for other webservers to use. It is recommended to always proxy Cantemo with another webserver that can handle long connections, serving of static media files and handling upload and downloads of files.
Our recommended configuration is for Nginx and comes with a configuration for serving media files such as javascript, css, png, flash and jpeg files.
Nginx (and other webservers) should be started by the process control of the operating system for example to stop and start on Linux RedHat / CentOS:
systemctl stop nginx
systemctl start nginx
If you need to restart Cantemo, there is no need to restart Nginx unless a change has been made to Nginx or its configuration.
Valkey
Similar to Nginx, Valkey is installed and enabled so that it is started automatically.
Empty the cache with valkey-cli -n 1 FLUSHDB
Sometimes it is necessary to clear out the Celery message queues,
which is done with valkey-cli -n 2 FLUSHDB
Note however that growing message queues is often a symptom of more serious problems
that need to be addressed.
Logging
On a Unix production system we log to a Unix syslog server, or a modern variant. This is because we can have multiple instances of Cantemo running with many workers at one time.
Using HTTPS
In a default installation, Cantemo is accessible over both HTTP and HTTPS protocol. This configuration is suitable for a secure environment such as when the system is deployed behind a company firewall or on a private network.
The default installer will create a “snake-oil” certificate for HTTPS. Most browsers will warn about this, some clients may decline communicating with the system over HTTPS.
If the system is internet accessible the recommendation is to configure the system to use proper HTTPS which encrypts the network traffic to protect it from attackers, and forcing communication over HTTPS.
Please get a SSL cert for your host from a certified supplier. For example Let’s Encrypt provides free certificates and scripts for automatic updates.
A certificate is provided as two files: a private key and a public key. Cantemo configures Nginx to read these from the following locations:
/etc/cantemo/portal/cert/privkey.pem
/etc/cantemo/portal/cert/cert.pem
So for example if you got privkey.pem and fullchain.pem from Let’s Encrypt, and stored these files in
/home/www-data/cert/, the commands to link to this would be:
# Delete old symlinks
rm /etc/cantemo/portal/cert/privkey.pem
rm /etc/cantemo/portal/cert/cert.pem
# Link to certificate files
ln -s /home/www-data/cert/privkey.pem /etc/cantemo/portal/cert/privkey.pem
ln -s /home/www-data/cert/fullchain.pem /etc/cantemo/portal/cert/cert.pem
# Restart Nginx to pick up new certificate
systemctl restart nginx.service
These commands should be executed as root user (e.g. with sudo). Please make sure the certificate files are
properly protected: It is enough that the root user can access as the Nginx process starts as root to read them
before switching over to the nginx system user.
The command sudo /opt/cantemo/portal/manage.py https_cert can be used to check certificate file status and create
a new snake-oil certificate.
See also _admin_system_settings for HTTPS related settings.
Note
When using a self-signed / snake-oil or otherwise untrusted certificate,
certain browsers and or browser versions may not download media files properly which can cause the video player not to work. In this case, make sure you have added the certificate to your computer’s local key store. How to do this varies between browsers and/or operating systems. You will also have to add the certificate to the truststore so vidispine can contact portal.
Using HTTP and HTTPS Proxies
If you need to specify proxy servers for any of the services/components that Cantemo is using, you will need to set them up by using environment variables. The http_proxy and https_proxy environment variables are used to specify proxy settings for client programs executing http requests. The format looks like:
http_proxy="http://SERVER:PORT/"
http_proxy="http://USERNAME:PASSWORD@SERVER:PORT/"
When setting them up, all the http or https requests will pass through the proxy. So, depending on your configuration, you might sometimes need to specify a way to skip some requests to go through the proxy. For instance, in the regular installation Cantemo and Vidispine are running on the same server, so it’s needed to avoid proxying the localhost address for them to be able to communicate. This can be done by using the no_proxy variable:
no_proxy="127.0.0.1, localhost"
In order to permanently set the variables, they can be added to “/etc/environment”, so that they will be loaded every time a new process is started. As most of the services in Cantemo are running under “systemd”, it is also needed to set them up in a special way for every service. If we take “portal-web.service” as an example of a service we want to specify these variables on, you will need to do the following:
First, create a folder with the service name and “.d” suffix under /etc/systemd/system/, for example:
/etc/systemd/system/portal-web.service.d
Then, add a text file (with any name), but with the “.conf” suffix, for example, “proxies.conf”, and add the environment variables like this:
[Service]
Environment=http_proxy=...
Environment=no_proxy=...
Repeat this for all the Cantemo services, then reload the systemd config so that the changes take effect:
systemctl daemon-reload
And then restart portal.target:
systemctl restart portal.target
Note
Always remember to properly specify the no_proxy variable, as the Cantemo installer is also making use of this and can fail if cannot establish a communication with Vidispine or other services.
Note
If the environment variables have been set in the current shell, and if the installer is executed through sudo, then remember to do “sudo -E”, otherwise the variables won’t carry over.
Changing the log level
Simply change the log level on Cantemo’s system settings page available under Admin
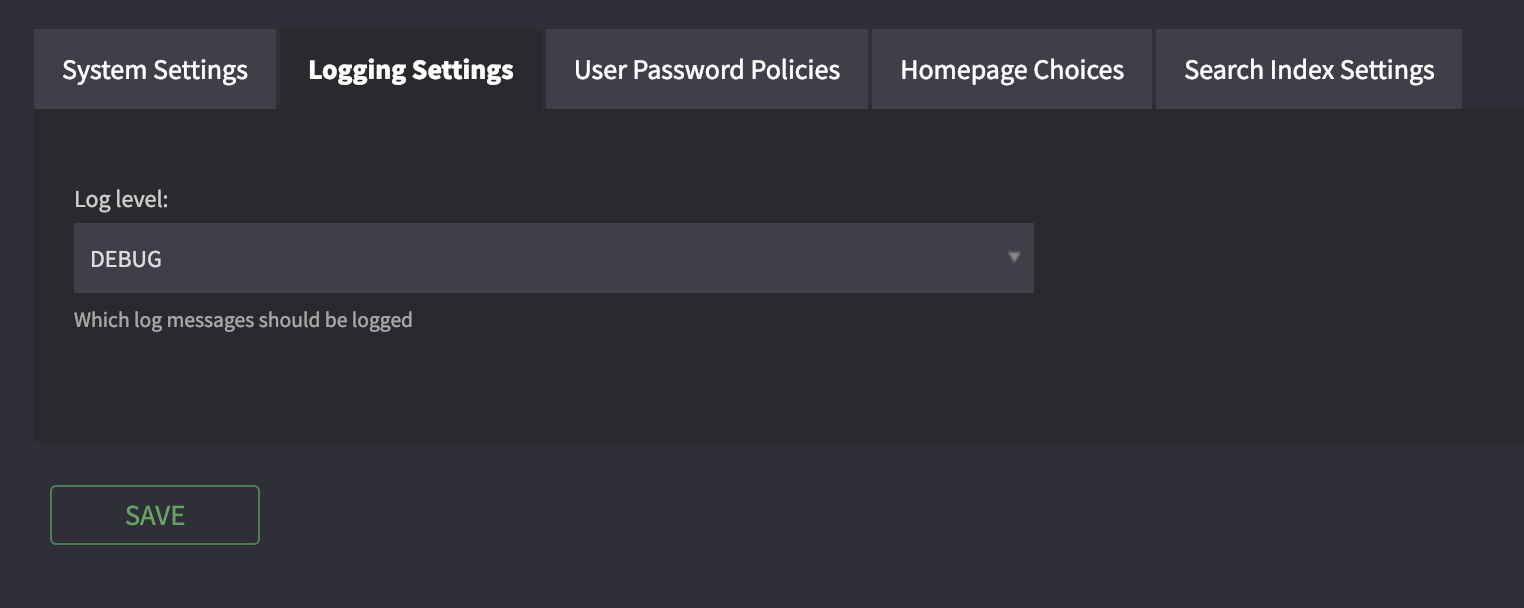
To one of these levels: DEBUG, ERROR, INFO, WARN, CRITICAL.
Click save and the change will take effect immediately.
More information please see Cantemo logging.
Additional logging parameters
Cantemo uses the Python logging module, and its documentation is a good source of further usage and configuration of logging such as handlers for automatically emailing certain levels, having a HTTP server for seeing log files and logging to multiple locations.